Tulle Tulle Tulle.. The Making of a TuTu

photo (1)

With three little princesses, we have bought our fair share (and then some) of tutus. Pink tutus, purple tutus, white tutus, blue tutus; you name it and we had bought it. Belle NEEDED a tutu for every outfit, mention that the pink one actually matched every outfit she owned and she was horrified that she only really needed one. This little obsession was getting costly, and lets be honest they look pretty easy to make. Here is my no sew, super easy, can make while watching TV in a single night way to make a tutu. And they turn out full, cute, and completely customizable.

Only 3 Items needed:

  • Scissors
  • 3 spools of Tulle (I use the 25 foot spools from Michael’s/Joann’s or the like)
  • Ribbon
  • Ruler (optional)

Lets make a TuTu!!!

  1. To start you need to make the waist band out of the ribbon. For me I like have a big bow in the back with the ribbon hanging down. Measure out about a foot to 18 inches, tie a knot. Now using your princess wrap the ribbon from the knot around her waist and tie another knot. You should have in between the two knots the length of your princesses waist. Measure your tie the same length as the first and cut. Woohoo the waist band is done. See super easy and a third of the way done. Go you!!
  2. Now to cut the tulle. You can use your ruler to measure out exact lengths, or you can use any other method that you want. Since I do this on my couch, in front of the TV, possibly with a glass of wine, I use one of my couch pillows to measure it out (it is about 12 inches wide). This will give your a 6″ tutu. My girls are little so this is good size for them. But if you want a wider tutu just cut the strips of tulle longer. The width will be half the length that you cut it. I like cutting my tulle first all at once. You will need to cut just about all the tulle, depending on how long the waist band is. Look at you go!! Almost done! photo 1 (6)
  3. Here come the fun part!! Applying the tulle to the waist band. Fold a strip of tulle in half, making an open ended loop.photo 4
  4. Place the ribbon on top of tulle, about half way down. photo 3 (1)
  5. Fold the open end of the loop up over the ribbon, and into the loop. photo 2 (5)
  6. Pull tight and slide as close to the knot as possible.  photo 1 (5)
  7. Continue until you cover all of the waistband and everything is tight. photo 5 photo 2 (6)

Your done!! See as promised easy, fast and cute!! Lets see how yours turned out. What colors did you choose to use?

Lush- Feeling Younger

photo 2 (4) photo 1 (4)

As I stated in my last Lush review, I am not a huge fan of cream based makeup. However, on that same trip to Lush, they had also talked me into trying (and then buying) Feeling Younger. Now I am not an easy, push over, eager to spend client that buys whatever the sales person tells me. Actually, quite the opposite. They REALLY have to work for a sale with me.

Getting off track there, so back to the review. I was on the fence about this one, it was nice in the store lighting. Made my under eye circles almost disappear, brightened my face. Overall did what it said it would. However, I was not wow-ed with it. It was nice and I could layer it above the Charisma (see here for review on that) on the days that I didn’t want a full face of make up. So I went with it.

When I went outside, in natural lighting, it was amazing. Not to shimmery to make me look weird, but enough to actually make me look younger. It was a great highlighter, and even made my little lines (no wrinkles, lets get that straight. There are NO wrinkles) vanish. My husband even commented on how great I looked. To me that says it is a keeper.

Christmas Traditions

photo 1 (3)

Gotta love Christmas! Even the most grinchly person, can get into Christmas lights. This year instead of driving around, stuck in the car trying to find neighborhoods that have nice displays up. We opted to go downtown, to the city court house. Which ALWAYS goes all out for Christmas. Baby, got so into it. She just thought that all the lights were the best thing ever.

photo 2 (3)

They were such good sports and never complained about the cold. (It was about 34 with a slight breeze). Tink was happy to break out all the winter accessories. She has been dying to wear all the hats, scarves, and mittens again. Belle was all about being able to jump in the leaves and kick the small piles of snow that were left laying around.

photo 3

Lets be honest, the best part of the night is coming home and baking the cookies. I am a total cheat when it comes to the baking of the cookies. There is no home-made, grandma secret recipe action going on over here… BUT I do make my own icing. And even with the cheater cookies, Tink and Belle had a blast frosting and decorating them.

What are your favorite holiday traditions?

Mason Jar Snow Candles

photo

Who loves mason jars?? The better question should be who doesn’t love mason jars? They are so versatile and can be used for so many things. As you know, I like crafting things that the kids can help with and that will turn out nice enough for around the house. I like win-win things!! So we are off crafting again. These candles are so cute, when lit they look like sparking snow.

This is a super easy, so cheap, fast, really cute idea when done. All you need is:

  • Mason jars
  • Cookie Sheet
  • Glue (we are fans of the Elmers School Glue)
  • Foam paint brushes
  • Epson salt
  • Tea Light candles

Okay lets make some candles!!

  1. Take the lids off the mason jars
  2. Pour salt onto the cookie sheet
  3. Use the foam brushes to spread a thin layer of glue all over the mason jar
  4. Lay the mason jar on its side in the cookie sheet and roll it to get the salt applied all over it
  5. Set the jar up to dry
  6. Once the jar is dry, fill the bottom of the jar with salt to make a holder for the tea light candle
  7. Place candle in the middle of the jar
  8. And your done

Tink had a blast making these. Belle was very into making it perfect: that all the sides were evenly covered and there were no bare spots. She took the longest to make hers. Baby just liked to play with the salt.

Post pics of how your candles turned out and how you personalized yours. Can’t wait to see them all

Lush- Charisma Review

photo 1 (2)

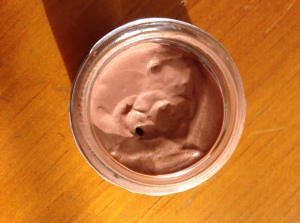
This little jar of perfection, should be on everyone’s wish list this year. Normally I am not a fan of cream based… well anything. I find them hard to blend, use, and general dislike. On my last trip to Lush, the sales girl talked me into trying this. It went on a little dark I have to say. I was a bit nervous, the last thing that I wanted was to walk around the mall looking like a clown. She laughed at my reaction and told me to blend it in using small circular motions with my ring finger. Once it was all blended in, it gave my face a wonderful glow. Not as harsh as most bronzers are on my fair olive skin. But just the right amount of sun kiss. It blends into your skin, so does not have any make-up like appearance. I use this on the days that I am not wearing a full face of make-up. When I just want some mascara and a little color to my cheeks.

For foundation, I use BellaPierre mineral foundation; and it seems that Charisma does not like to play nice with this. It might be trying to put the powder under a cream. Don’t know, but since most days I don’t wear foundation, this is not a big problem for me. But is noteworthy to those who use a powder foundation every day.

photo 2 (2)

Have you guys tried this yet? What are your thoughts?

3-D SnowFlakes

Completed SnowFlakes

It is the holiday season. How did that happen? Wasn’t it just Thanksgiving? Anyway, I have a love/hate relationship with this. One the one hand, I love spending time with my kids, hot cocoa, fireplace going and watching it snow. On the other, I feel the need to go all out; decorate, cook, bake, craft, it is endless. So much to do, so little time.

Well this great little craft is not only is easy, fast, cheap but your kids can do it too. You get to spend time with them, while making something that is worthy of hanging up in your home (family time, crafting, and decorating all in one). To me that is a total win-win-win.

Lets start by gathering all of the supplies. I like having everything put together before you start, that way you are not looking for something or worse realize that you are missing something half way through. You will need:

  • Bamboo Screwer- 12″ preferability
  • Styrofoam Balls- in various sizes.
  • Spray Paint- in what ever colors you want. Make sure that you get one that is okay to use on Styrofoam. I didn’t realize that there was a difference; and if you get just normal spray paint, it left a slightly uneven finish or eats away a small bit of the Styrofoam. Not a big deal to Tink, she said the small flaws made them more realistic. Gotta love that kid.
  • Small bit of Glue- We used Elmer’s School glue.

Okay lets make some snowflakes!!!!

  1. Lay out all your supplies.
  2. Pick up one of your large Styrofoam ball.
  3. Push one of the screwer through the center of the ball. Your ball will be in the middle of the screwer.
  4. Push a second screwer through the center of the ball at an angle.
  5. Push a third screwer through the center of the ball at an angle. At this point you will have your ball with three screwers through the center: one straight down, the other two forming an X.
  6. Push the various smaller sized Styrofoam balls onto the remaining screwers in what ever pattern you like. I preferred going largest to smallest, but the kiddos liked seeing them in all different variations.
  7. When you get to the end and are about to put on your final ball, put a small amount of glue on the end of the screwer. It will run, and that is okay. Now push the ball on. I turned mine a bit to make sure that the glue got inside the ball. This is not essential but I found it does help hold everything together a bit more.
  8. Spray paint them whatever colors you like.

Viola you are done!! Easy as that. It took us about 45 minutes to complete this; start to finish. We made about a dozen snowflakes. I did use some tulle at the end so we could hang them around the house; since the girls love seeing their creations around the house. How did they turn out for you guys? Post me some pics so we can see them.

Happy Holidays!!!!!

photo 2 (1)

Too Faced- Natural at Night

 Case

This is one of those pallets that I have been looking at for a while, and finally bit the bullet to purchase. Let me tell you, it is by far one of the BEST, let me repeat BEST, pallets that I have purchased. The colors have a good mix of matte and shimmery, they all blend very easily and there is next to no fall out. Plus, they last all day without creasing. You can create the looks that they give you, or create your own looks very easily.

Open View

It contains nine shades of eyeshadow, ranging from an day look to a dark going out look. You can tell that I have been playing with this, it comes much prettier right out of the box. I promise you. Starting on the top left moving across are:

  • Full Moon- which is a light caramel shimmery color.
  • NightCap- which is a medium teddy bear matte brown.
  • Cocoa Star- which is a dark slightly reddish matte brown.
  • Night Light- which is a light pinkish shimmery brown.
  • After Hours- which is a medium pinkish shimmery brown.
  • Eclipse- which is a dark purple shimmery brown.
  • Spot Light- which is a light creamy yellow matte.
  • Moon Stone- which is a medium green shimmery.
  • Night Fever- which is a dark green shimmery.

I fell in love with this pallet. How did you guys like it? What are your favorite colors in this set?

Come back and see the tutorials in the next few days for different ways to wear this beautiful set.